Not too bad. I thought I could live with it until I made the heated pants (which I don't like and may re do) and connected them to the box. This time I had it plugged into the bike and smelled the same funny smell. I quickly killed the power and decided I'd also killed the box the next day when the gloves stayed too hot no matter how low I turned the knobs.

I used the front panel piece as a guide to make holes in the side of the plastic container and a knife to make them rounder and a little larger. Doing this eliminated having to modify the knobs like I did with the previous board. With the holes out it was easy to slide the little board in place and re-attach the knobs. Later, I put the cord inside the box instead of taping it the outside. Here are the final results:


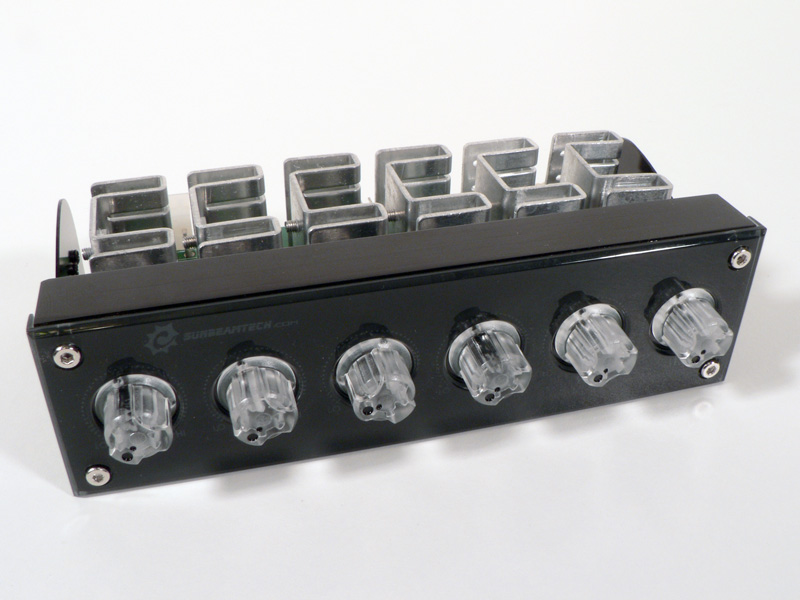
 I wanted to attache the front panel to the outside of the new box but it was too tall. Later, I added a simple inline on off switch so that I could turn the power off to the controller instead of all of the electronics I have connected to the y-adapter. With the new look, it's a lot easier to adjust the temperature on the fly. An added benefit is when I have the gps/pda mounted, I can see the screen better.
 I'm also trying thinner outer gloves. The old gloves are bulky and change the feel I have for the bike. To replace the Heine Gericke gloves, I went to Lowe's and got some deerskin or goatskin gardening gloves. Back when I took the MSF Beginner Course, one of the instructors had a pair and said they make great motorcycling gloves. When I lived in Long Beach, CA, I tried a pair from Home Depot but they were too stiff and I never got comfortable wearing them. They became regular garden gloves when I moved home to Georgia and made my first garden.
I tried the new gloves this afternoon but I let my hands get too cold before I put them on and didn't wear them long enough to see if the thinner gloves work.

I also realized I had the gloves on too high which necessitated me turning the gloves on and off often and the reason I added the switch. As my mother reminded me when I explained the failure, this is all a learning process. If I stick to it, I'll get it right! She's a great mom.
Here are links to all of the DIY Heated Clothing posts.
No comments:
Post a Comment